The secret life of Material Entities.
Material entities in Overte are quite powerful but still, not very often used, I think in part it is because of some of it’s quirks, like the fact that you can not apply the same material entity to more than one object (there are workarounds for this though), but really, I think the main reason is that it just seems a bit complicated.
In reality it’s not that complicated, there is just a lot to keep track on with all those property names and stuff.
Luckily you don’t have to remember all that stuff, I will provide some examples you can use and modify to your liking.
What are material Entities?
-
Material entities can be used to apply materials to models, avatars or shapes by making the material entity a child of the object.
-
For models and avatars, you can select which submesh and/or material slots you want to override.
-
You can override the material as a whole, replacing the original. or only override selected properties and keep the others as original by setting a property to
fallthrough. -
Material entities have a priority property, many material entities can be applied to the same mesh, but only the one with the highest priority will show, unless
fallthroughis used in which case that property will “fall through” to the next highest material property. -
The properties of the material is JSON formatted text and supplied in the MaterialURL field, this can be either a link to external file or “MaterialData” in which case it will look in the “MaterialData” field for the JSON formatted data.
-
The material data can contain multiple named materials that you can access by appending the name in the MaterialURL field, if the data only contains one material this can be omitted.
Why would I use material entities?
-
Applying custom shaders to avatars and entities (and shapes but here userdata can be used instead).
-
Quickly test different materials, no need to export a model 10 times to get it looking just right. Just live edit the material in-world.
-
Special effects using 3d projected mode or UV offset animation.
-
Changing some properties of a material on a model, like making glass double sided and transparent, or making part of a model render unlit.
-
Linked materials, in the sense that many objects can reference the same JSON file so changes to that file will show on all the objects.
-
Shared properties, for example you could have several different entities with each their own material, but all tinted in a color set by a single material Entity.
-
Setting material properties that are usually not possible in models, like setting emission higher than 1 to get a bloom effect.
-
Simply putting materials on shapes.
How do I create material entities?
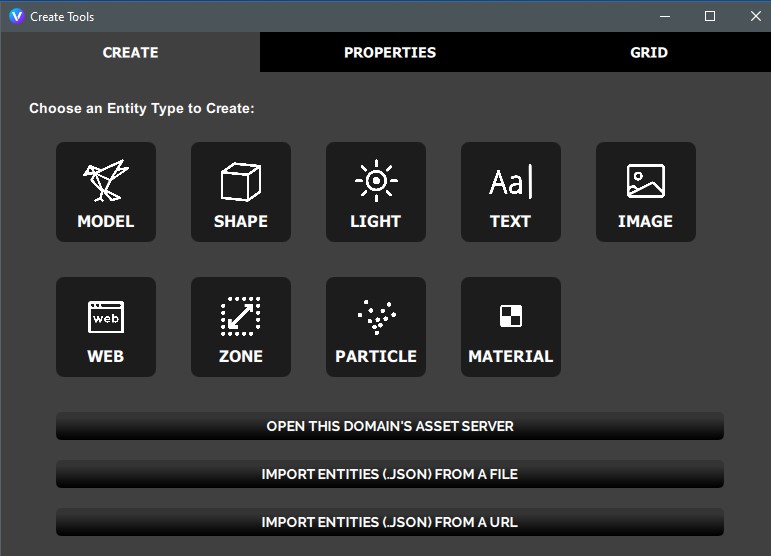
To make a material entity you can click create->material, if you don’t put anything in the Material URL field you get an empty material with the material URL set to MaterialData.
Note: About the
Material URLfield.The
Material URLfield does, inspite of it’s name, accept 3 kinds of input:
An URL, obviously. Note that it expects a link to a material resource JSON file, NOT a material Entity JSON file, they are not the same. Yea, it’s confusing, and unless the file is properly named to identify what it is, you will just have to try it or take look inside at the contents to identify it, it is just text after all, and here are some examples to look at:
- This is a material entity, it has lots of stuff about the entity properties in it: Material Entity
- This is a material resource, it only has the actual material data in it: Material Resource
“MaterialData”. this indicates that material properties are taken from the materialData field of the entity. This is the “normal” way to use material entites and also the default if you leave the prompt that pops up when creating a new material entity blank.
The UUID of another material Entity, like:
{9d5f4ea5-9229-478c-af03-48328c0da135}
In this case, this is another you can link one or more material properties of multiple Entities so that they all change if you modify that one “master” material.
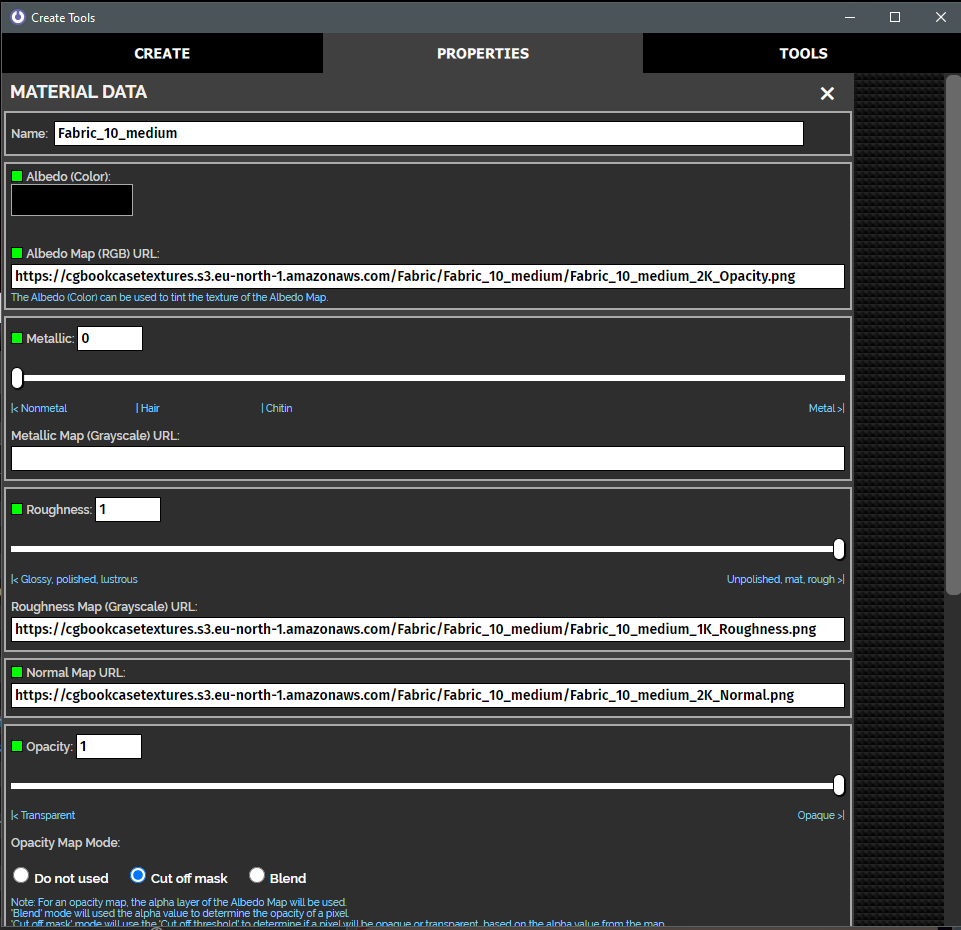
So, you created a material entity, But it’s blank, so now you have to know which properties to put in there ![]()
Your first, and most intuitive option, is to use the material assistant IMAGE HERE, it provides a nice graphical interface where you can modify most of the material properties.
If you want to dig into it a bit more You can look here: Entities - Overte API Docs to see the available properties, but honestly it’s just easier to load an existing material and modify it’s properties from there, here’s a material entity with the most basic properties already filled out:
http://silverfishbucket.s3.amazonaws.com/OverteForum/Materials/basicMaterialEntity.json
That should be a good starting point.
I usually prefer putting the data in the material data field of the entity instead of in an external file, but if you like to have it all in one central file or you use the same material on a lot of objects it may be better reference an external JSON file.
Note: importing JSON files.
JSON files are used somewhat ubiquitous in Overte for all sorts of stuff so you kind of have to know what is in it to know how to use it, but for the most part, they represent an entity, or a collection of entities with all of their properties and relative relations, like this sippy Bird:
http://silverfishbucket.s3.amazonaws.com/OverteForum/Materials/SippyBird_Green.jsonthat will load a fbx mode with animation and two materials in 3D projected mode parented to specific bone.
To load a JSON like this you can:
Simply drag the link onto the interface window.
Use the create menu to load from url or file:
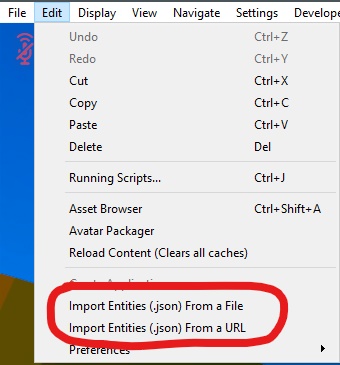
use the main menu->edit:
Load it via script, If you know how to do that you probably find this guide really basic :SMILE
How do I use material entities?
To use the material you need to parent it to a shape or model, first select the material entity, hold shift and select the target entity and then press ctrl+P, the material entity will change from a little ball into an material icon:
![]()
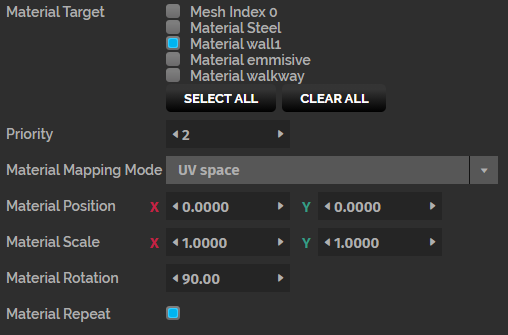
Now, it you select the material entity again and select the material tab in the create menu you can edit the properties of the material and how it applies to the target, importantly, you need to select which submeshes and/or materials you want to apply the material to, but you can also adjust stuff like scale, rotation, and priority;
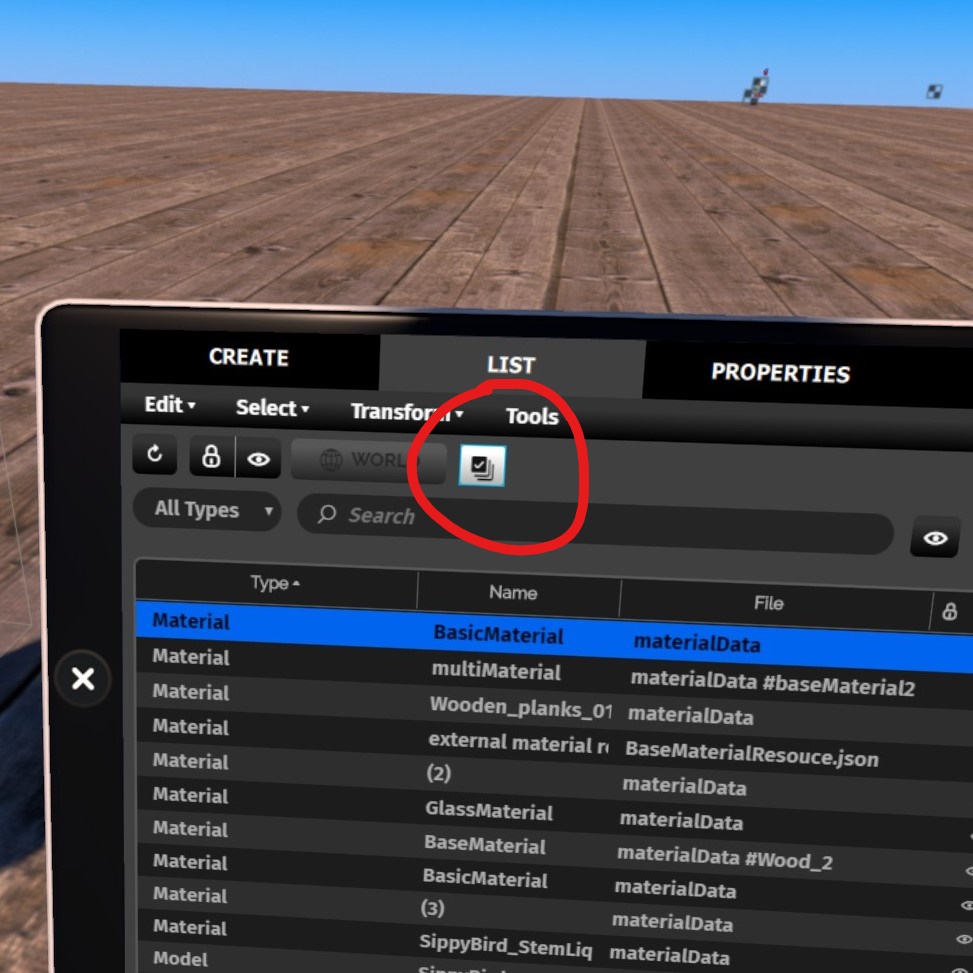
Note: Parenting in VR mode.
To parent an entity in VR mode you open the list view in the create menu and enable multi select mode:
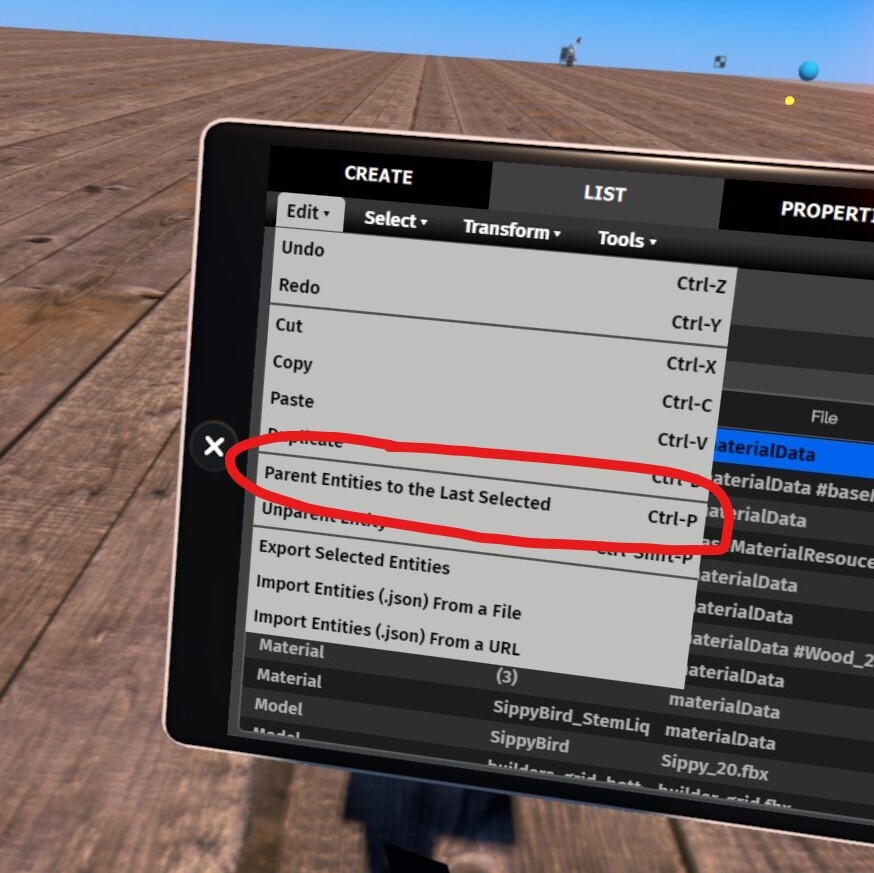
Now you can select first the material, then the target entity and in the edit menu, select:
Parent Entities to the last Selected
There are more tricks you can do material entities, like using a Web Entity as a texture or getting material properties from another Web Entity but this is already getting a bit long so I will leave that for a follow up post, maybe, once I get some good examples set up.
For new, I will just leave you with a few more examples, That’s how I usually figure stuff out so maybe it works for you too:
-
Here is a material entity that preserves all of the original properties of a model, but makes it render unlit (flat shaded) good for toony stuff and anime avatars:
http://silverfishbucket.s3.amazonaws.com/OverteForum/Materials/Unlit.json
You can change thecullFaceModeproperty toCULL_NONEto make it render double sided (no backface culling). -
This material contains two different kinds of wodden planks, change the
#Wood_1part of the Material URL toWood_2. You will have to reload content for it to take effect:
http://silverfishbucket.s3.amazonaws.com/OverteForum/Materials/DoubleWood.json -
As stated, you can also use an URL as the material resource, here’s one like that:
http://silverfishbucket.s3.amazonaws.com/OverteForum/Materials/externalResourceMaterialEntity.json -
Some glass, transparent and double sided:
http://silverfishbucket.s3.amazonaws.com/OverteForum/Materials/GlassMaterialEntity.json -
For this one, I added all of the properties I know of and added
_disabledto the property name of the unused ones so if you delete that part and supply a valid value it will become active:
http://silverfishbucket.s3.amazonaws.com/OverteForum/Materials/baseMaterialEntity.json
Note: this may not all be correct.
I did not properly test or fact-check all of my claims in this post so if you find an error or outright lie
let me know or, even better, update the information yourself.