The process for adding textures to models isn’t as intuitive as it could be and we will work on that as time provides. It is however a relatively easy process and I will do my best to explain it here. My primary work does not involve modeling so please correct me when necessary or add anything useful to the discussion.
I want to thank Alezia Kurdis for the material feature that ties this all together. She is an excellent modeler and programmer in her own rights.
I won’t get into an in-depth discussion of what PBR textures are. PBR stands for Physics Based Rendering which uses different images in a pipeline to simulate materials from the real world.
For the sake of this tutorial there are seven types of images that make up this pipeline:
- Albedo maps provides the model color (It uses a shadowless image).
- Metallic maps tells the renderer what parts of the model should be treated as metal.
- Roughness maps provides the level of gloss which controls the amount of sharpness to the reflections on the model.
- Normal maps provide the bumpiness of the model and gives the model a 3D appearance.
- Emissive maps make your models appear as they radiate their own light.
- Scattering maps work by spreading light that penetrates the surface, interacting with it and exiting the surface at a different point.
- Occlusion - Ambient Occlusion maps (AO) add shadows to objects with crevices
If you are skilled you can create your own map files and there certainly are graphic programs out there that can help you with that. For the sake of this tutorial we will simply use one of the free texture websites. https://marmoset.co/
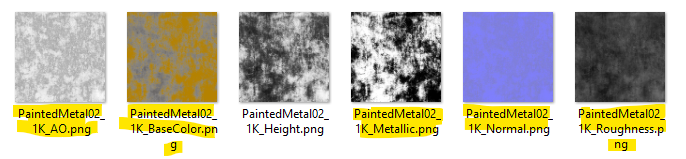
I browsed this website looking for texture that I can add to my object. You do not want to use any of the 4K resolution textures. These are too large and will certainly make it difficult for people to render your domain. Choose the smallest available. In this case I have downloaded and extracted a 1K texture. Not all textures will have a metallic map. Only those that have a metallic surface will. Yet I have chosen a map that has many of the maps used in Overte. There are more PBR materials available that Overte does not use, yet the ones we want are here…
TIP: You can increase site performance by using an image manipulation program like GIMP to reduce the size of these files even further.
First, we will need a model. This can be a model from the web or a model you uploaded into the asset server. For this tutorial we will just use a simple shape.
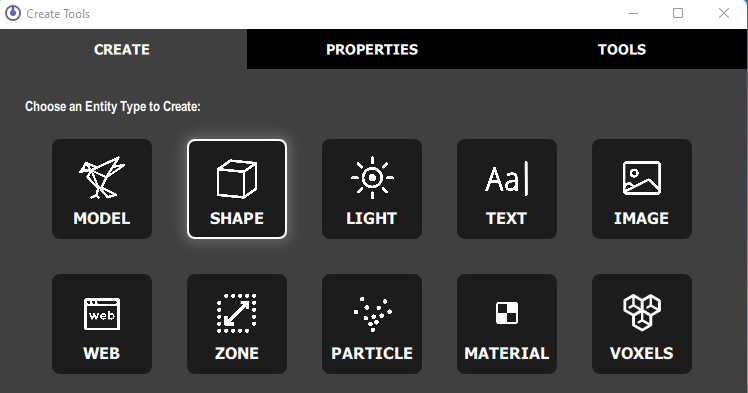
- Click on the create icon in the HUD.

- Click on the SHAPE button under the CREATE tab of the Create Tools window.
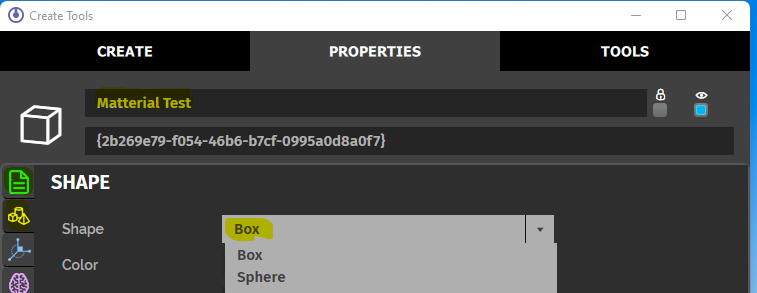
- Name the shape, select the shapes button and accept the default shape, box.
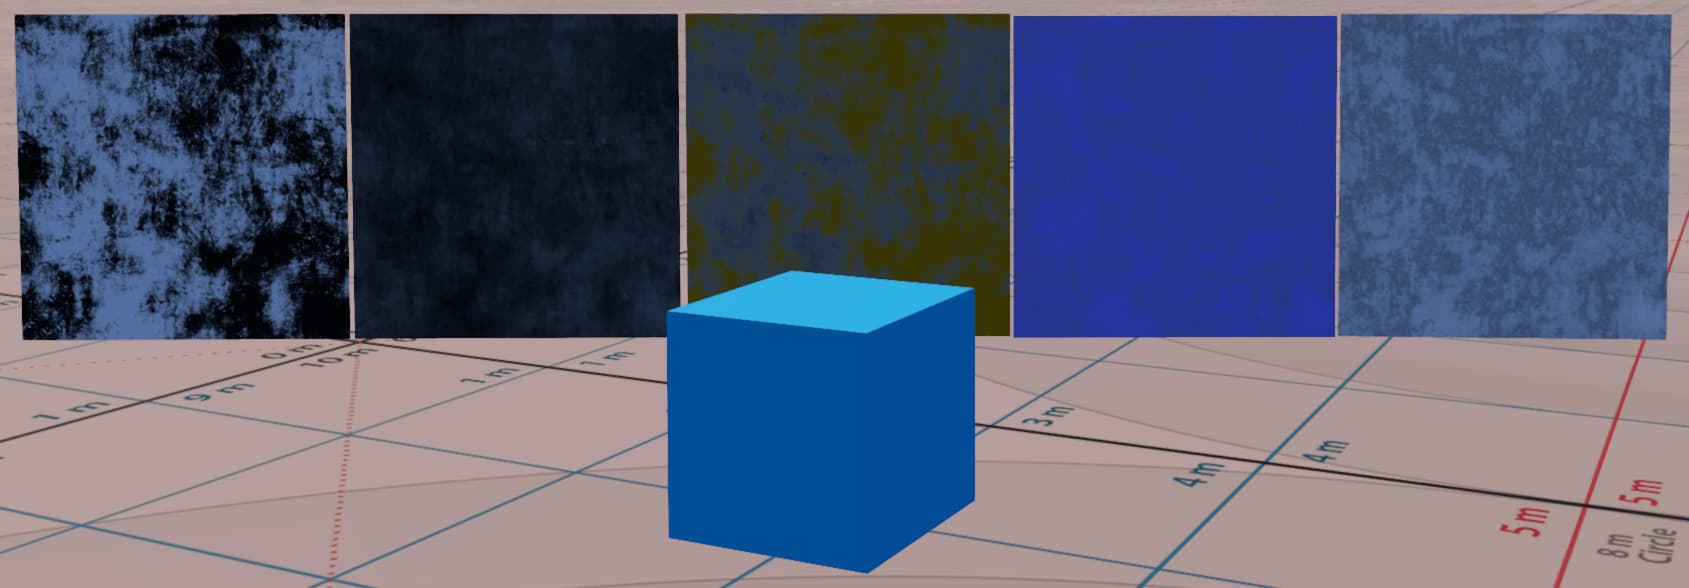
- Drag and drop the textures into your world.
To note, all the textures have automatically been added to your asset server. You can view items in your asset server by clicking the “OPEN THIS DOMAIN’S ASSET SERVER” button found under the CREATE tab of the Create Tools.
I have arranged everything so it’s in my view. Next we want to create a Material object.
- Click on the MATERIAL button under the CREATE tab of the Create Tools window.
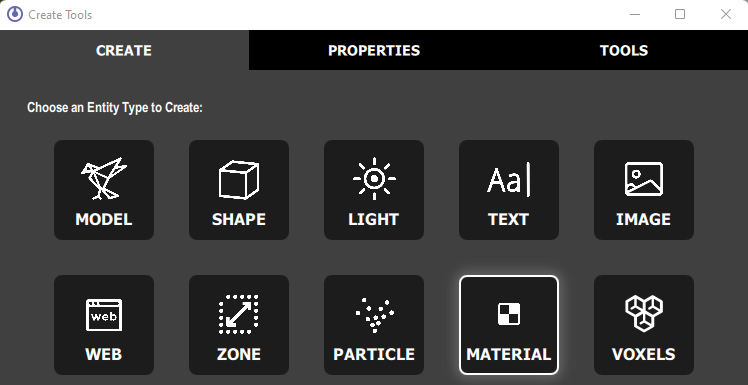
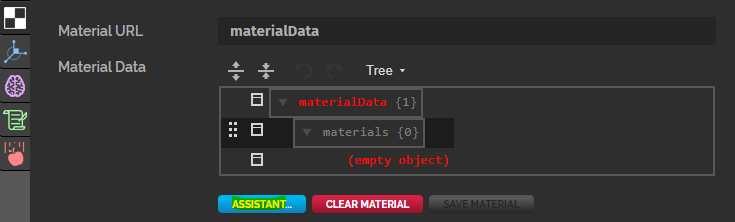
You will be prompted for a URL. You optionally can provide a URL to a material already created. We are building this from scratch… press CREATE
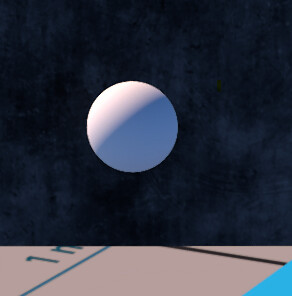
You will notice a plain white sphere has appeared in your view. Do not delete, this is your material entity.
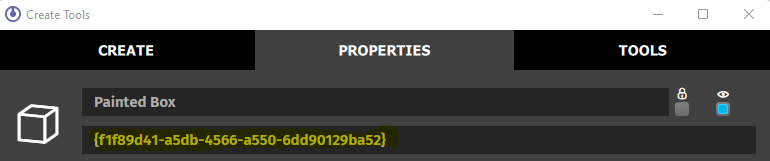
- Give your material a name. I have name this “Painted Metal”. Click the Material button.
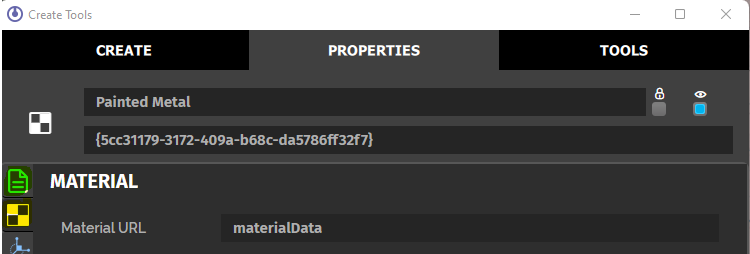
- This is the default view and will likely be swapped with the ASSISTANT view in the future. You will see why (Alezia Kurdis created the ASSISTANT). Click the blue ASSISTANT button.
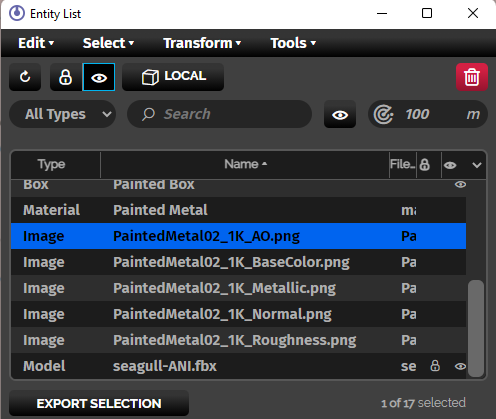
- You will notice that there is a Color picker for Albedo and an Alebedo Map (RGB) URL. In this case we are going to provide a link to the file in your asset server in place of the URL. To get that link we need to select the PaintedMetal02_1K_BaseColor texture in the interface. You can do that in the CREATE App by either selecting the texture on the interface or by clicking on the object in the Entity Browser.
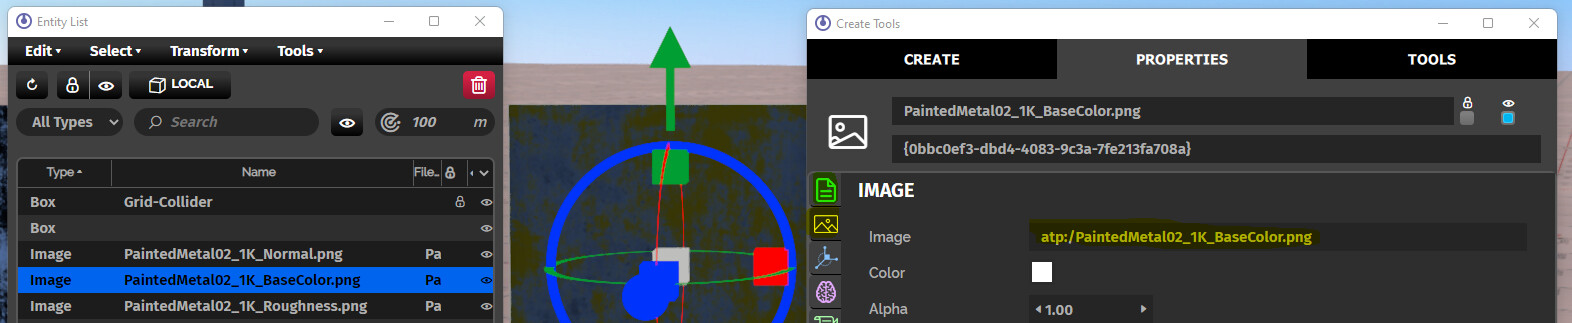
You will find the path to that file in the Create Tools → Properties → Images in the “Image” textbox.
In this case we see that PaintedMetal02_1K_BaseColor.png is found at:
atp:/PaintedMetal02_1K_BaseColor.png
We can save ourselves time by finding all the paths to the other images:
PaintedMetal02_1K_BaseColor → atp:/PaintedMetal02_1K_BaseColor.png
PaintedMetal02_1K_Metallic → atp:/PaintedMetal02_1K_Metallic.png
PaintedMetal02_1K_Roughness → atp:/PaintedMetal02_1K_Roughness.png
PaintedMetal02_1K_Normal → atp:/PaintedMetal02_1K_Normal.png
PaintedMetal02_1K_AO → atp:/ PaintedMetal02_1K_AO.png
- Enter these locations respectively to the maps they define… the AO is way at the bottom of the window so I did not capture it here.
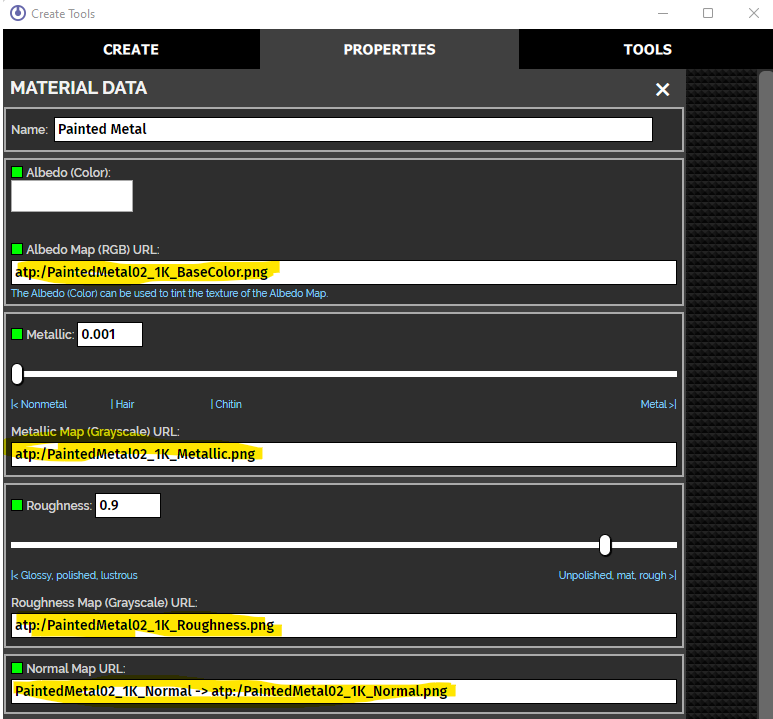
As you enter the values you will notice they are immediately applied to the material object you created. You can play with the slider or add percentages to the the maps as provided.
- To apply our material to our object we need to click on the cube in the Entity List. Under properties you will find the cube’s ID number. Copy this number.
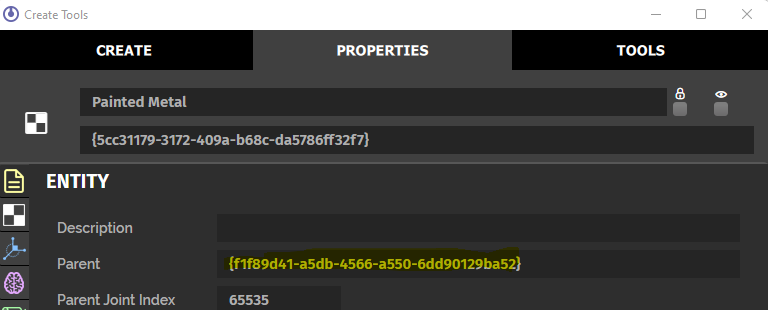
- Click on the material we created. And under the ENTITY Section paste the cube’s ID in the Parent text box.
- Hide the textures by clicking on it in the Entity List and clicking the eye button at the top. DON’T DELETE these textures or it will mess up your material.
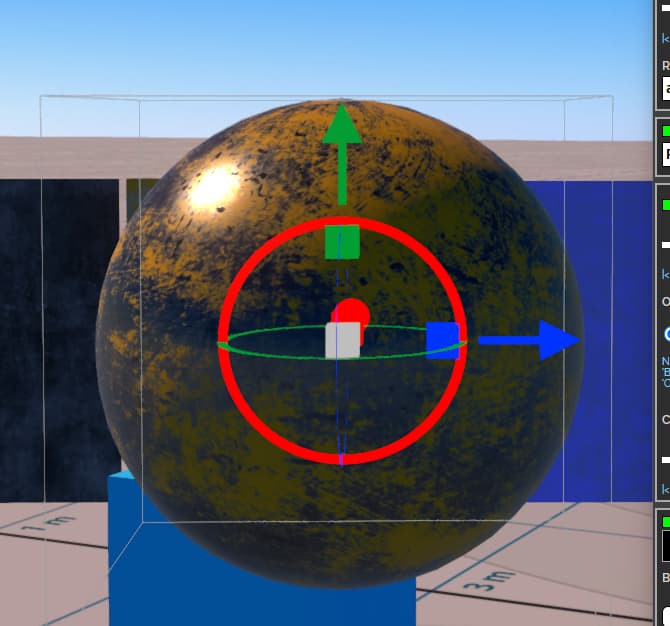
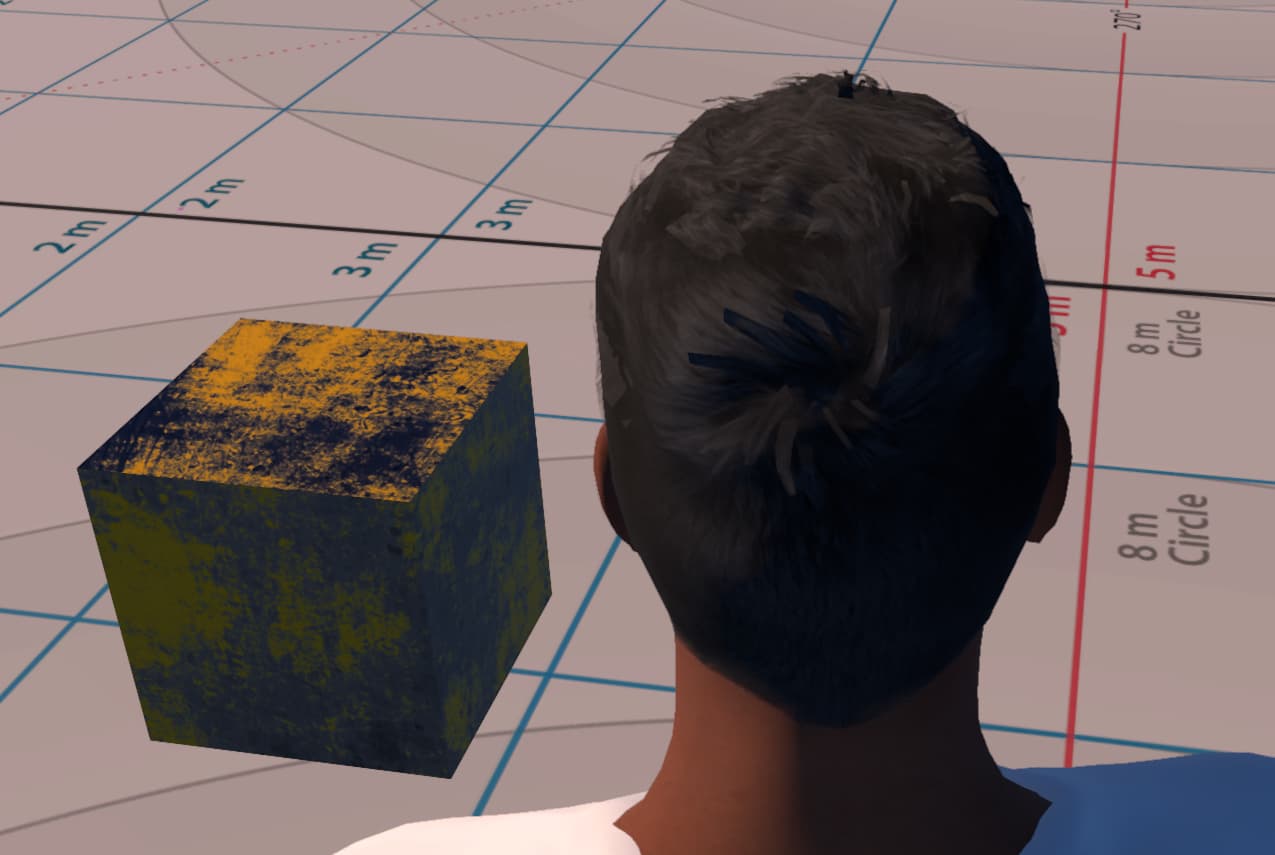
- You can move your object to wherever you like. Close the CREATE App windows when you are done. You now have textured your object.
Time to relish your work…
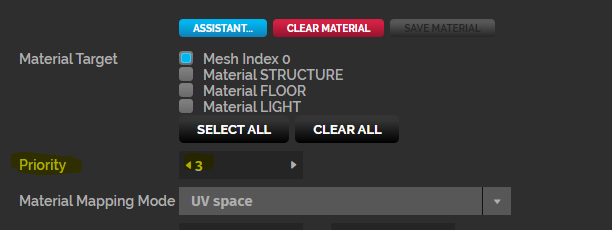
NOTE: If your material is not rendering you likely need to check the Priority level… This can be found near the bottom of the Properties window of the material. Also, if you have a multiple objects in an model, you may need to select it under the Material Target section.