In this tutorial you will learn how to design a world in blender and import it to Overte.
Prerequisites
Basic blender skills are required. In particular, the ability to add new objects to the scene and edit their properties. You might want to consider checking out the “Create app” which lets you build your world directly from Overte.
- Create New Entities
Before we start
To create the world, we will need blender version 3.2 or higher and the Overte client. In this guide, we will not use a server (so-called Domain-server), the world will be created locally, without a network connection.
Note: If you plan to create more advanced scripts, the use of a domain-server may be required. However, this is not the topic of this guide.
Download the latest version of the io_export_overte plugin from github and install it in blender. Go to Preferences > Add-ons, click the install button and select the downloaded zip file.
Floor and lighting
With such a prepared environment, we are ready to roll.
-
Create a new project in blender and remove the light and camera from it.
-
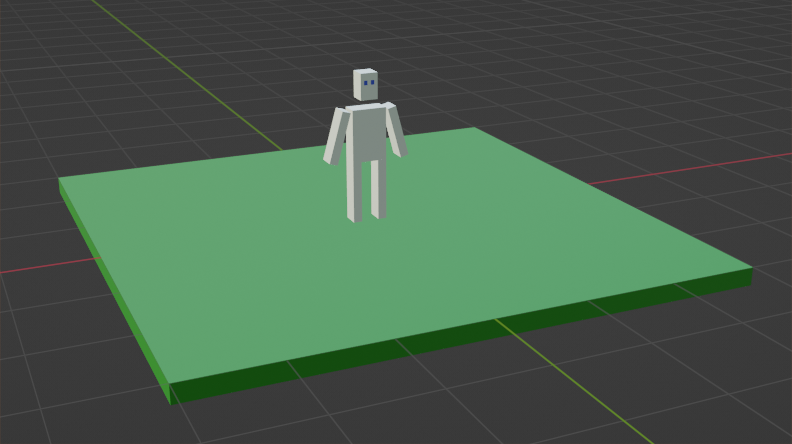
Resize the cube so that it resembles a floor. Example dimensions are 20m x 20m x 0.2m. Additionally, you can change its color to green to make it look like grass. Let’s rename this object “Cube.Floor”.
-
Now add another object and shape it into a 1.7m tall human (it doesn’t have to be perfect). It will be used to determine the initial position after loading the world. Name this object “Path.default”.
Let’s export the scene prepared in this way to a JSON file. Select File > Export > Overte (*.json) and save the file to disk in a separate folder, e.g. “D:\my-world\world.json”. To load this scene in Overte, open the “Explore” application and enter the address “file:///D:/my-world/world.json”.
Note: If for some reason you don’t have the “Explore” app, or it doesn’t allow you to load your json file, you can do this step via the console. Press Ctrl + Alt + J and when the console appears type: "location.handleLookupString(“file:///D:/my-world/world.json”)
The floor is visible, but the whole world is gloomy and dark. In the next step, we will add the sky texture and set the lighting.
- Rename the collection from “Collection” to “Zone.Sky”. In the right pane, in the “Collection properties” section, an additional panel titled as “Overte Zone” will appear. Change the following settings:
- Zone margin: 100.0 (this will increase the area occupied by the zone by 100 meters on each side)
- Skybox Mode: ON
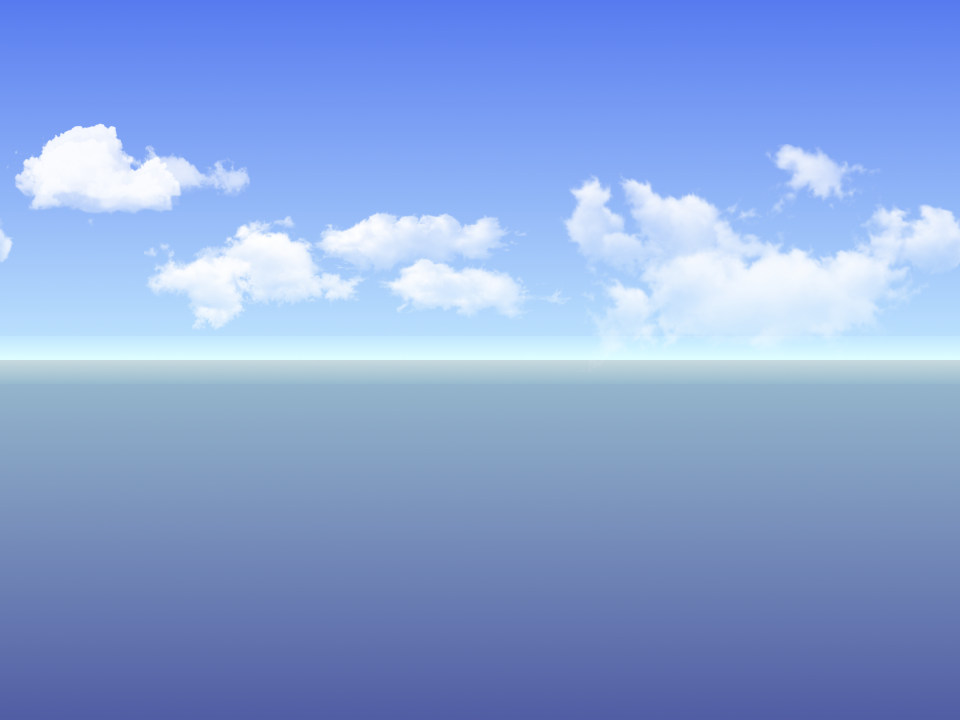
- Skybox URL: images/skybox.png
- Ambient Mode: ON
- Ambient URL: images/skybox.png
- Keylight Mode: ON
The file “skybox.png” should be downloaded and saved in the place where the json file was exported, e.g. D:\my-world\images\skybox.png.
- One more important change needs to be made. In the world settings, in the “Overte Settings” panel, you need to enter the correct Domain URL. This is the address from which textures, models, scripts and other files will be downloaded. Type following: “file:///D:/my-world/” (remember the last slash!)
After making these changes, let’s export the scene again. Then in the Overte application, hit Edit > Reload Content. After refreshing the content, we should see the texture of the sky.
Note: It’s a good idea to set the same skybox in blender (Environment Image), thanks to which in render mode we will have a fairly similar view as in the Overte application.
Models
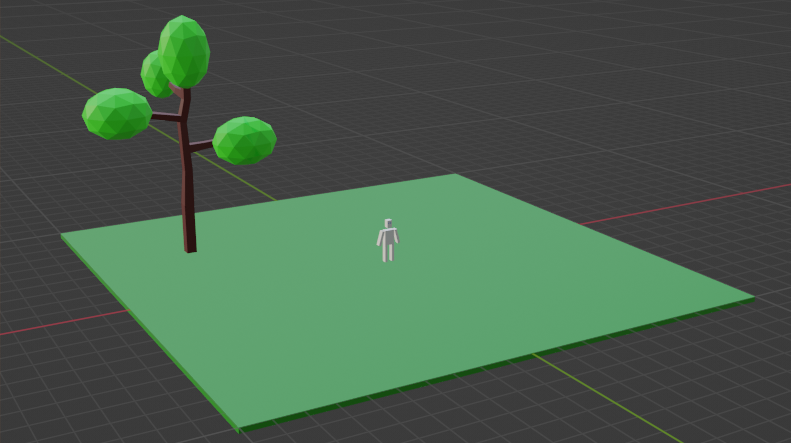
- The scene is now lit, but still empty. You can now unleash your inner artist and let’s create a more complex object. I made a tree like below.
-
The tree should be a single object named “Model.Tree”. When an object name starts like this, a GLB file will be created for them when the world is exported.
-
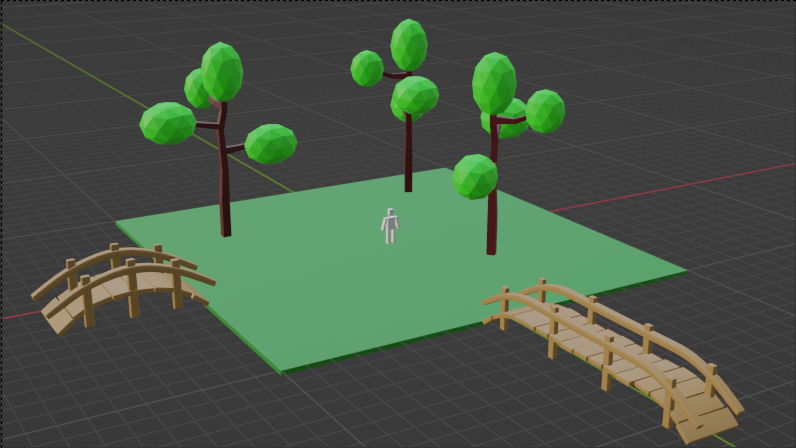
Let’s say we want a forest, and for that we need more trees. Let’s duplicate our tree with Alt + D and place it in different locations on the map. If we were to export our world now, a separate GLB file would be generated for each tree. This is not very efficient considering that all these files are identical. This can be fixed by assigning them the same file name in the object properties, in the “File Name” field. Let’s enter “Model.Tree” there, then all objects will share the same “Model.Tree.glb”.
Asset Browser
- It often happens that we already have a 3d model file on the disk that we want to use, and we would like to avoid generating the GLB file every time we export the project. This is achievable, but requires a few changes to the settings.
As part of this tutorial you can download bridge models (CC0 license).
- Unzip the models on the disk, in the folder where we export the world, i.e. D:\my-world\models
- Add models to Asset Browser. It is important that the names of objects in the Asset Browser correspond to the name of the file from which this object comes (without extension)
- In “Preferences > Paths > User Library” add the path where we export our world, e.g. “D:\my-world” (so that the plugin knows where to look for external model files)
- Now we can drag models from the Asset Browser and place them on the stage, and when exporting to a JSON file, they will be automatically assigned the URL corresponding to the file on disk.
Zones, hierarchy
Our world is getting bigger, there are more and more objects in it. It is worth taking care of the proper structure of our scene graph. Thanks to this, the renderer will work faster - it will not have to analyze all objects when the Zone is completely out of our view. This is extremely important for large maps.
-
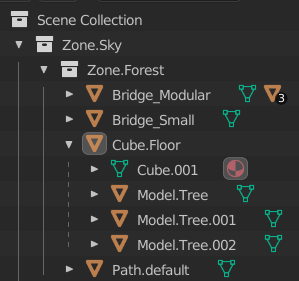
Let’s create a new collection called “Zone.Forest” and transfer everything we’ve created to it. Then let’s put the “Zone.Forest” itself inside the “Zone.Sky” collection, thanks to which it will inherit its properties.
-
Moreover, tree objects can be attached to “Cube.Floor”. Then their position on the scene will be relative to the parent (floor) and if we move the floor, the trees will also move.
Images, Text
The next step will be to add a new platform on which there will be so-called “avatar-trap”. When the user enters the designated field, his avatar will change. Ultimately, our scene will look something like this:
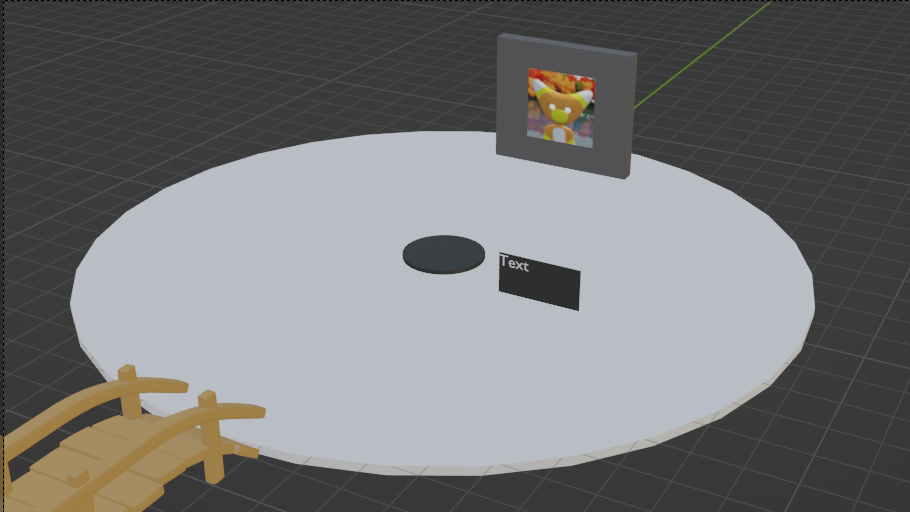
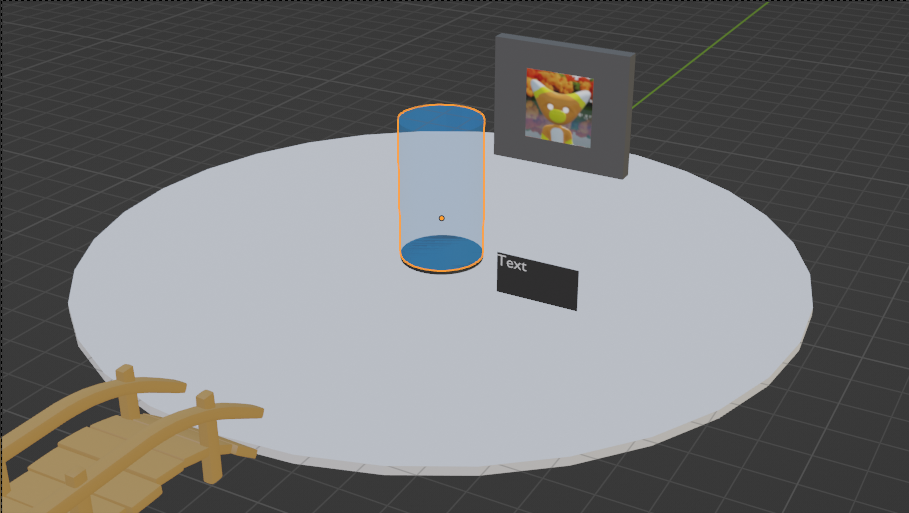
Let’s start by adding a new collection called “Zone.Platform” and add the following objects to it:
-
Cylinder.Floor / Cylinder.Plate - add them via “Mesh > Add > Cylinder” and set them to the appropriate size and color.
-
Cube.Wall - the wall on which we will place the picture with the image of the avatar - we will assign the material to this object. In the properties of the material. In the “Material URL” field, let’s enter the path to this JSON file, thanks to which the brick texture will be displayed instead of the original color of this object.
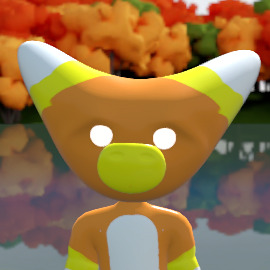
- Image.Preview - picture on the wall - Select “Mesh > Add > Plane”. Rotate the newly added object by 90 degrees in the X axis, thanks to which the image will be turned right side up. If you are wondering which side of the image is the front, you can check its normal. The blue side is the front side and the red side is the back side. In the properties of the object, we set the Image URL and check the emissive checkbox, which makes the image brighter.
I have also assigned the texture to this Plane object. The texture image is ignored by the exporter plugin, but it gives a good preview in blender.
- Image URL: http://oaktown.pl/voidboy_corn_1/avatar.jpg
- Emissive: True
- Text.PleaseEnter - text object placed near the center of the platform. As in the case of the image, here we will also use the “Plane” and rotate it 90 degrees about the X axis. Let’s set the color of the object to dark gray, and in the properties of the object let’s set the text, for example “Please step on me.”
- Text: “Please step on me.”
- Text Size: 0.2
Scripts
Our plafroma already looks good, but it doesn’t work yet. The last step we need to do is to assign a script to it.
-
Download this script and save it in your world folder, i.e. D:\my-world\scrips\avatar-trap.js
-
Add a new cylinder and place it directly above “Cylinder.Plate”. This object will not be displayed, but when the user enters it, the script will be activated. In the object properties, uncheck the “Visible” and “Collisions” checkboxes, and in the “Script” field, enter “scripts/avatar-trap”. As the object will not be displayed, I decided to assign it a high transparency to easily distinguish it from visible objects.
- Visible: False
- Collisions: False
- Script URL: “scripts/avatar-trap.js”
After exporting the project and reloading the world in Overte, our trap should work.
License
The tutorial is licensed Apache 2.0
Bridge models are CC0 license, comes from Ultimate Platformer Pack.
